
I’ve been hearing about tres leches cake for years. The famous Latin American “three milk” soaked cake. My mom’s friend made it for every birthday. A coworker swears it’s “the best thing in the world.” And every single time, I’d nod along while thinking, honestly, I don’t get it — what’s so special about a cake that’s soaked in milk?
So I made it. And I have to admit: one bite and I understood the obsession. It tastes like a soft vanilla pudding, except cold instead of warm. That’s the whole magic of this cake.
What tres leches cake actually is
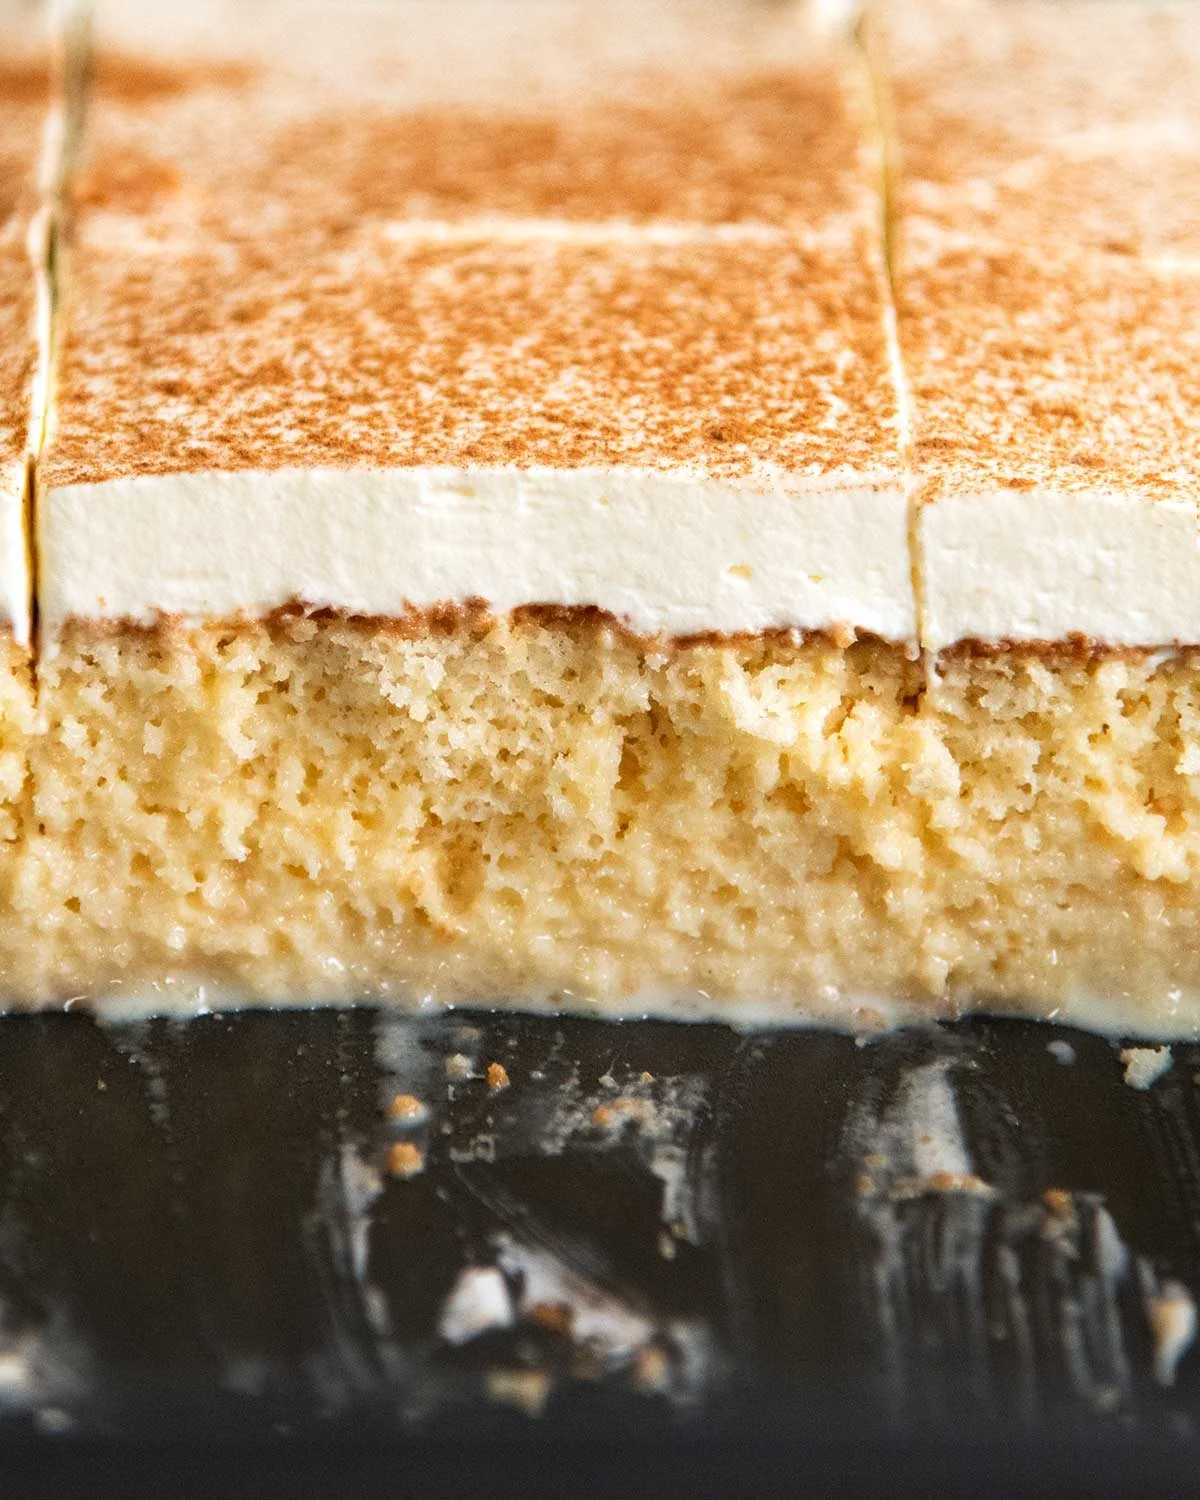
Tres leches literally means “three milks.” The recipe is a vanilla sponge that you poke full of holes, then soak with a sweet mixture of sweetened condensed milk, evaporated milk, and cream. The cake drinks it all up and turns into something almost like a cold vanilla pudding — and despite all that liquid, it’s not soggy or mushy. The sponge is built to absorb the milk while staying light and springy.
It’s a brilliant cake for sharing, too. A full pan makes about 20 slices comfortably (or 12 giant ones if you’re feeling bold). It stays in the pan, which makes it easy to transport, and it actually gets better the next day. It’s also surprisingly on the low end of sweet — even by Latin American dessert standards. I was not expecting that.
I adapted the recipe from Ina Garten’s version, which is the one I’ve found that actually works — the sponge holds up beautifully even after soaking up almost 4 cups of the milk mixture. It doesn’t fall apart, the milk disperses evenly through the crumb, and the texture stays plush. I’ve made a few small tweaks of my own, and they’re all in the FAQ below.
What you’ll need
First, the three-milk soaking mixture. You only need two kinds of milk plus cream — some recipes use milk instead of cream, but I much prefer cream. It adds a little richness to a cake that’s otherwise made without any added fat.
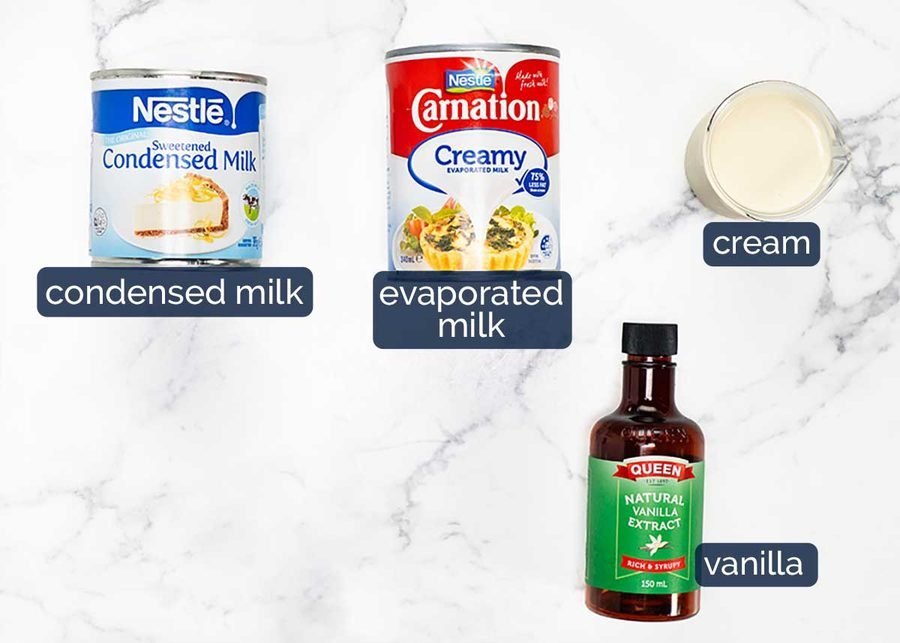
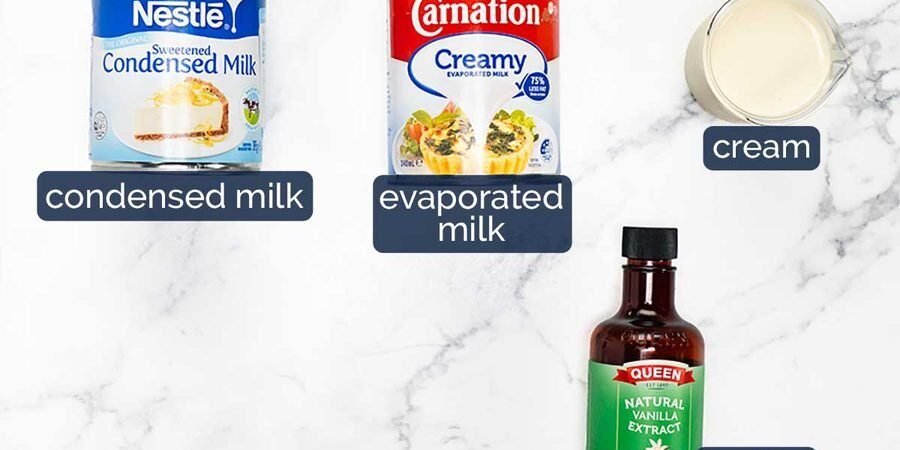
- Sweetened condensed milk — the thick, syrupy sweet milk in a can. You’ll find it in the long-life milk aisle. This is what brings the sweetness.
- Evaporated milk — unsweetened concentrated milk, also in a can, right next to the condensed milk. A slightly thicker pour than fresh milk.
- Heavy whipping cream (thickened cream in Australia, double cream in the UK) — I use this to bring a little much-needed fat into the cake. You can use milk instead if you prefer, but use less, since it’s thinner and will soak the crumb faster.
- Vanilla extract — use real vanilla, not imitation.
- Optional: almond extract — just 1/2 teaspoon. Not traditional, but a common variation, especially in US versions. It adds the faintest hint of amaretto, and honestly, it’s lovely. If you have it on hand, I’d add it.
Then the cake itself:
- All-purpose (plain) flour — not self-raising. This cake’s rise is delicate, so you want to control the leavening with the exact amount of baking powder.
- White sugar — superfine (caster) or regular granulated both work. I keep superfine in the house as my default for baking, but granulated is fine here.
- 3 large eggs, at room temperature. This cake relies heavily on the whipped eggs to make it rise, so fridge-cold eggs won’t fluff up as well. In a hurry? Pop them in a bowl of warm water for 5 minutes — not hot, or you’ll cook them.
- Baking powder — if yours has been sitting in the pantry for a while, check that it’s still alive. Don’t swap in baking soda.
- Vanilla and a little salt — salt just brings out the rest of the flavors.
How to make it
Plan ahead: you need to start this cake at least 5½ hours before you want to serve it. That’s 20 minutes of active work, 25 minutes in the oven, 30 minutes of cooling, and at least 4 hours in the fridge while the cake absorbs the milk mixture. To be honest, it’s even better the next day — once it’s fully chilled all the way through, it slices so much more cleanly.
1. Make the cake
The whole trick to the soft, springy crumb is beating the eggs. You’re going to beat them for 10 minutes to aerate them. If you have a stand mixer, this is the part where it earns its place on your counter — while the eggs are whipping, you can measure everything else and butter the pan.
Whisk the flour, baking powder, and salt together in a bowl and set it aside. Then put the eggs, sugar, and vanilla in the bowl of a stand mixer fitted with the whisk attachment, and beat on medium-high for 10 minutes. The mixture will turn pale yellow and fluffy. That aeration is what makes the cake rise. (Using a handheld electric beater? High speed, and just swap arms when they get tired.)
Turn the speed down to low, and with the mixer still running, slowly pour in half the flour mixture, then all the milk, then the remaining flour. Stop the mixer once most of the flour is incorporated, then finish by hand with a rubber spatula — scrape the base of the bowl well. Don’t keep mixing after that, or you’ll deflate the batter and end up with a less fluffy cake.
Pour the batter into a 9 x 13” (23 x 33cm) metal pan that you’ve buttered well. Use a metal pan, not glass or ceramic — glass doesn’t conduct heat the same way, and the cake won’t rise as well. And don’t line the pan with paper, or you’ll be scraping paper off every slice. Bake at 350°F (180°C; 160°C fan-forced) for 25 minutes, or until a skewer inserted into the center comes out clean. The top should be a deep golden color.
Let it cool in the pan for 30 minutes before you do anything else. Cakes are fragile when hot, and if you pour the milk mixture over a cake that’s still steaming, it can turn into a soggy mess.
2. Poke, soak, and refrigerate
Poke with enthusiasm. More poking means more even soaking.
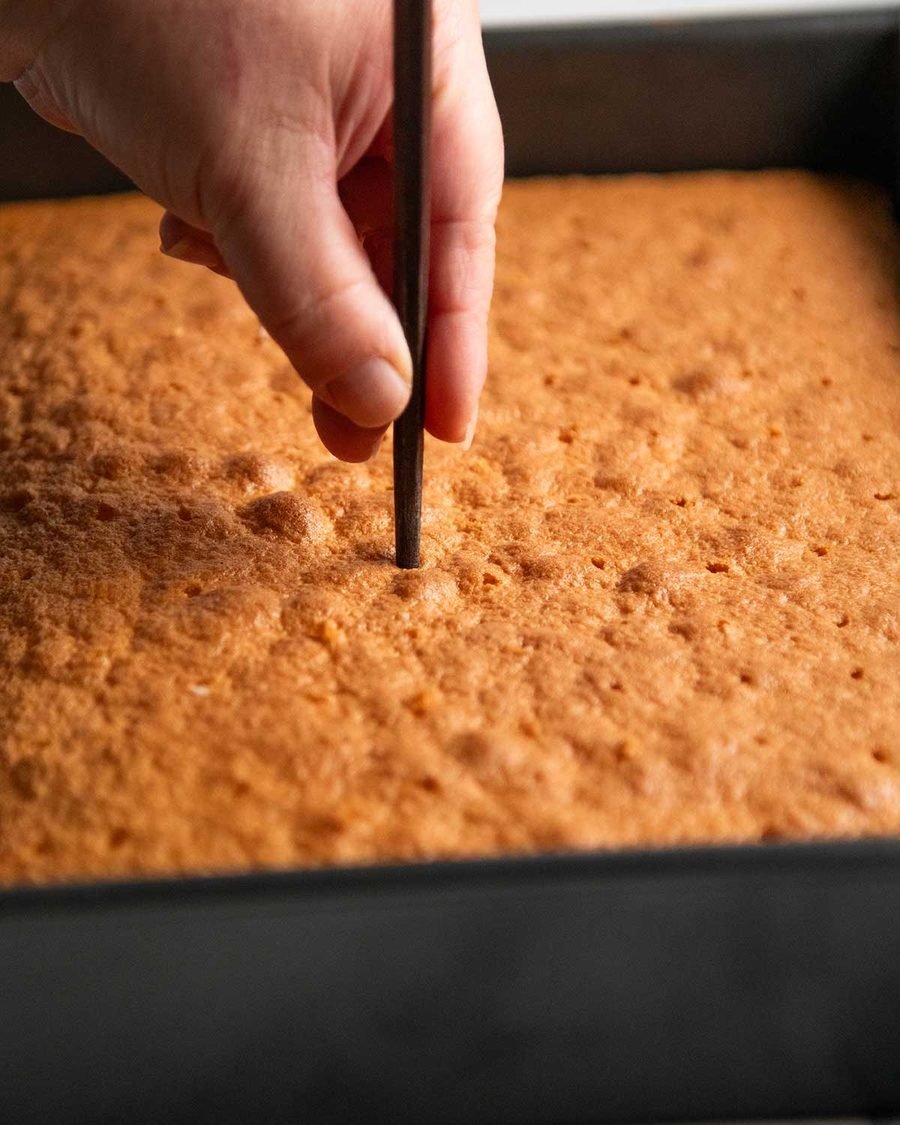
While the cake cools, whisk the three-milk ingredients together in a large bowl or a very large jug. Then take a thin chopstick and poke lots and lots of holes in the cake, all the way down to the base. I do around 130 — ten rows of thirteen holes. Nobody wants to hit a dry patch with tres leches cake.
I know most recipes say to use a bamboo skewer or a fork, but I kept ending up with dry spots — the holes were just too small. A thin chopstick makes bigger holes, and the milk soaks through faster and more evenly. Don’t worry about the holes looking big; the crumb expands as it absorbs the milk, and the tunnels disappear.
Slowly pour the milk mixture over the cake in about 3 additions, giving it a minute or two between pours so it can soak in.
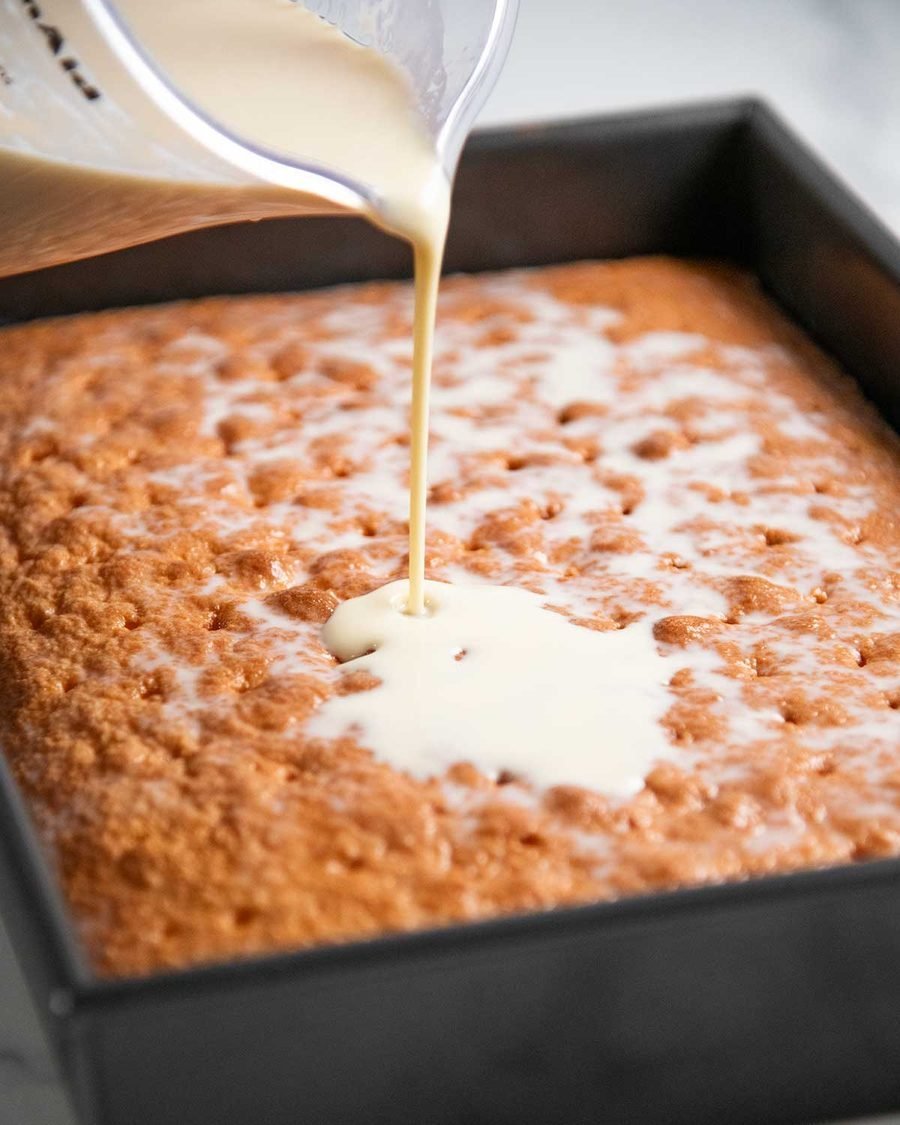
Refrigerate for at least 4 hours, or overnight. The milk needs that time to work its way evenly through the whole cake.
3. Top and serve
On the day you’re serving it, whip the heavy cream with the sugar and vanilla until it’s firmly whipped, then spread it all over the top of the cake. Give it a light dusting of cinnamon, and cut into slices — right in the pan, where it holds all that milky goodness in.
Storing and making ahead
Here’s the thing about tres leches that makes it my favorite kind of party cake: it’s actually better made ahead. It keeps beautifully for 2 days, and it’s still very good for up to 4 days in the fridge. And it’s one of those rare cakes that’s genuinely great eaten cold, straight out of the fridge — which, let’s be honest, is a lot more convenient than a buttercream-frosted cake that turns rock-hard in the fridge and makes you wait half an hour before you can dig in.
The whipped cream will hold up for about 2 days, since it’s just spread on top rather than piped or sandwiched. If you want it to stay freshly-whipped-fluffy for longer, you can stabilize it — a cream stabilizer powder (the kind you find in the baking aisle of most grocery stores) works well: just add it to the cream and whip as usual, and it stays fluffy for up to 3 days.
Tres leches cake FAQ
Can it be made gluten-free? I haven’t tried yet, honestly. If you do, I’d love to hear how it goes.
How long does it keep? Up to 4 days in the fridge, though it’s best for the first 2. On day 3, the milk mixture has soaked the crumb a little more, so the cake tastes “wetter” and you might notice a little liquid seeping out of the base — it’s still great, just a touch damper. Also keep an eye on the shelf life of the cream you used.
Can I use a different pan? Anything with a similar surface area to the 9 x 13” pan works: two 8” round pans (the cake will be a smidge taller), two 9” round pans (a smidge flatter), or two 8” square pans. Avoid springform pans — the milk mixture will leak out. Baking time stays about the same: check at 25 minutes, and if it needs more, cover with foil so the top doesn’t over-brown.
Why I use this particular recipe
I’ve tried a few tres leches cakes over the years, and I’ll be honest — I wasn’t thrilled with any of them. The sponge would turn a little mushy after soaking, or there’d be dry patches, or the crumb felt too “rough” instead of plush.
Then I made Ina Garten’s recipe, and it clicked. The sponge stays incredibly soft and springy even after soaking up almost 4 cups of the three-milk mixture, and every bite has that milky flavor without turning into a soggy mess. I think the secret is in the batter itself: unlike recipes that separate and whip the egg whites, or add butter or oil, this one simply beats the whole eggs with the sugar and adds no fat to the batter at all. The result is a lean, dry-before-soaking sponge with a real spring-back crumb — built exactly to drink up all that milk while keeping its structure. And it’s wonderfully easy, since there are no egg whites to separate.
The few tweaks I made: I cut the soaking liquid by half a cup, because the sides of the pan got a little too saturated with the full amount. I use a chopstick instead of a skewer for poking, since it works faster and soaks more evenly. I made the almond extract optional, since it’s not traditional (though I love it when it’s in). I chill for 4 hours instead of 6, since the bigger chopstick holes let the milk disperse through the cake faster. And I top it with a cinnamon dusting, which is the traditional finish.
A note from Nora
The first time I made this, I got a little carried away with the poking and nearly broke the chopstick in the pan. Sam walked in, saw me standing over the cake like it owed me money, and asked if it was fine. It was fine. It was better than fine.
We’ve made it twice since. The first batch lasted exactly two days — my daughter had a “cake for breakfast” phase that week, and Biscuit was standing right outside the kitchen the entire time. The second batch, I left the almond extract in, and I think it makes the cake even better, so I’m keeping that as my default now.
This one passed the Tuesday test — well, mostly. It’s a make-ahead cake, so you bake it Tuesday and serve it Thursday, but the active work is about 20 minutes, and the rest is just poking and waiting. If you can make it on a Tuesday, it’s a keeper.

Leave a Reply